Host Your Own FTP and SFTP Servers With Arc
Arc provides a simple interface for hosting your own FTP or SFTP server. This article guides you through each of the steps required to start receiving inbound FTP and SFTP connections from your trading partners.
- FTP/SFTP Server Profile
- FTP/SFTP Connectors
- Sending and Receiving Files
- Active Directory Integration (Windows Authentication)
- Next Steps
FTP/SFTP Server Profile
The first step for hosting inbound traffic in Arc is to set up a local profile for the protocol you want to support. The configuration settings in your local profile apply to all inbound connections (e.g. all FTP connections, or all SFTP connections).
The Profiles page has a tab for each of the various protocols you might want to use when hosting a server:
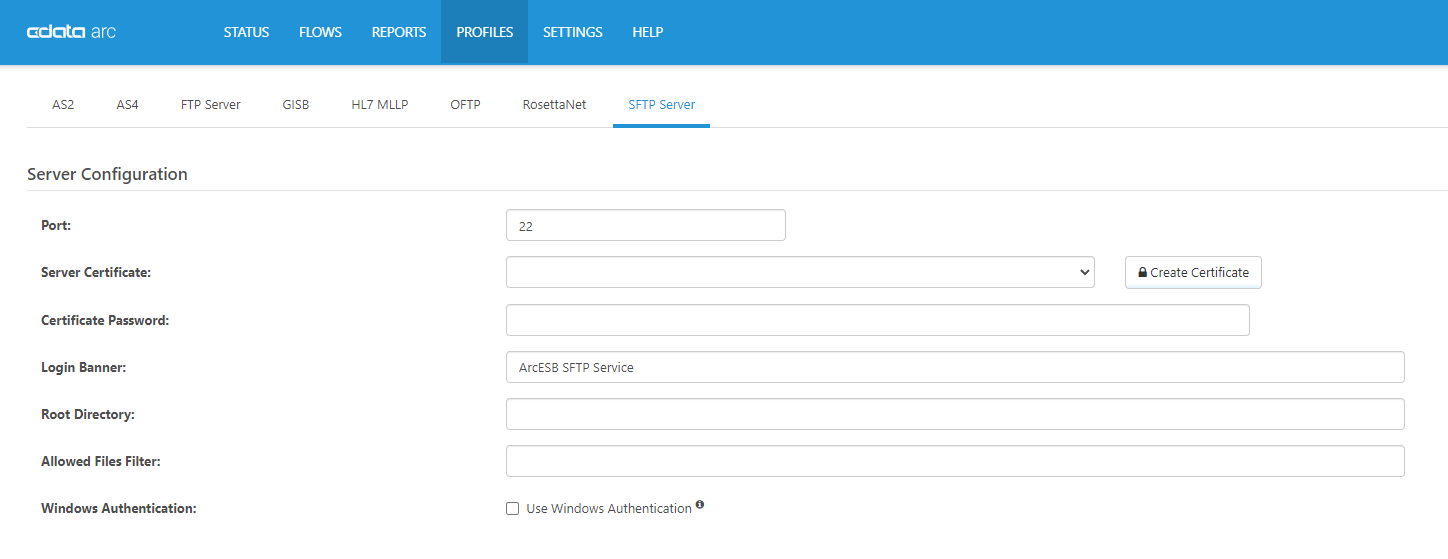
Local profiles for FTP and SFTP are very similar and require the following core configuration settings:
- The Port on which the server will listen for incoming connections
- The Server Certificate that identifies the server (and its Certificate Password)
Arc includes a tool for creating your own self-signed certificate if you do not already have a certificate handy. Simply click the Create Certificate button to bring up the certificate creation modal:
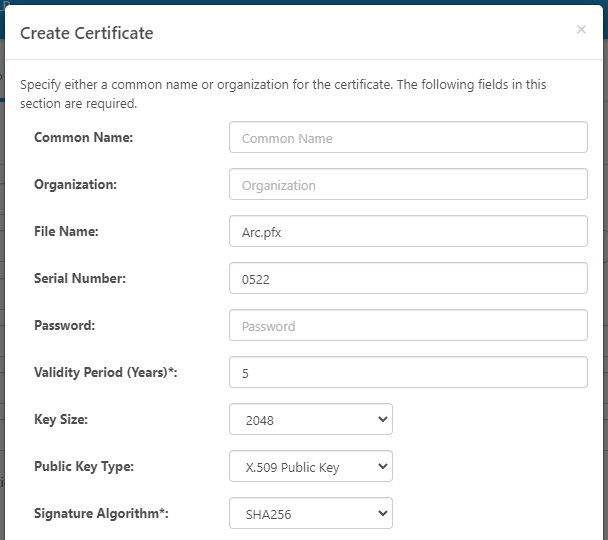
The key fields in this certificate creation dialogue are the Common Name and/or Organization to help identify the certificate, and the Password that will be required to access the certificate's private key.
The FTP and SFTP profiles have more advanced configuration settings like the ability to filter inbound files according to their filenames or file extensions, and the ability to change the default root of the server. Feel free to configure these according to any specific needs your company has. The default values in the application are designed to be ready-to-go for the vast majority of users.
FTP and SFTP Server Connectors
Once the FTP or SFTP Profile has been configured, its time to create FTP Server or SFTP Server Connectors in the Flows page.
Each FTP Server Connector and SFTP Server Connector provides a set of login credentials and a dedicated home directory. Thus, each distinct user that needs to connect to your server will have their own S/FTP Server Connector.
Find the FTP Server or SFTP Server Connector in the toolbar on the left of the Flows page (under the MFT category) and drag it into the flow canvas to create an instance of the connector. Then, its time to configure the connector:
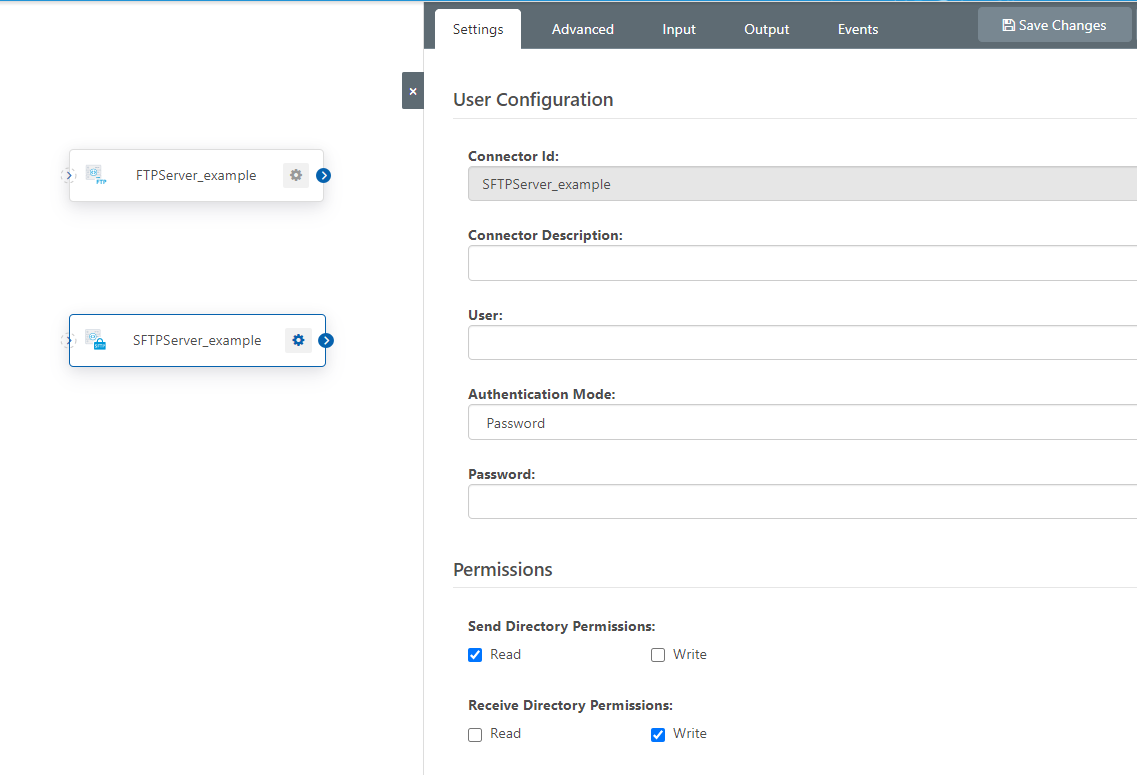
For FTP Server Connectors, the login credentials are always provided as a Username and Password. The SFTP Server Connector supports various alternative authentication methods like Public Key, Keyboard-Interactive, and Multifactor.
In addition to login credentials, each connector provides a home directory and set of folders for users to upload and download files.
Sending and Receiving Files
Connector Folder Structure
First, each connector has a dedicated folder within the root folder of the server. To check the location of the root of the server, find the Root Directory field in the Profile page.
Each connector folder has a Send and Receive subfolder, intended for downloads and uploads, respectively. In other words, the application expects that remote clients upload files into the Receive folder, and download files from the Send folder.
This folder structure helps integrate the FTP Server and SFTP Server Connectors into a larger configured workflow. However, if you would prefer to change this default folder structure and use custom folders, you can navigate to the Advanced tab within the connector configuration and set your desired folders in the Local Folders and Additional Paths sections:
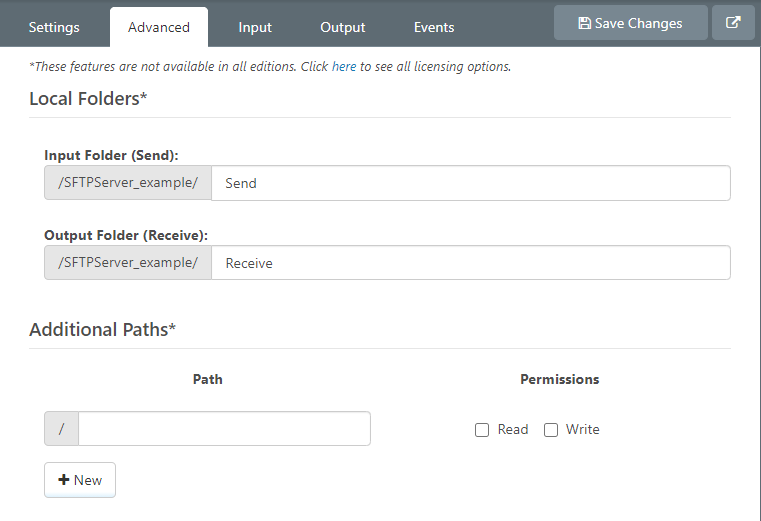
Note: folders specified in the Additional Paths section will not interact with other connectors in the flow. Folders set in the Local Folders section will be part of the connected workflow as described in the next subsection.
Using FTP & SFTP Server Connectors in a Connected Flow
Arc will use the folders in the Local Folders section (by default the Send and Receive folders) to interact with other connectors in the workflow canvas.
When a remote client uploads a file into the Receive folder of a connector, Arc knows to pass this received file along to the next connector in the Flow.
For example, lets say you wanted files that are uploaded to the SFTP Server to automatically be compressed into a ZIP archive. The ZIP functionality will be handled by a ZIP Connector, and I can use the blue flow arrows to tell Arc to pass files along from the SFTP Server Connector to the ZIP Connector:
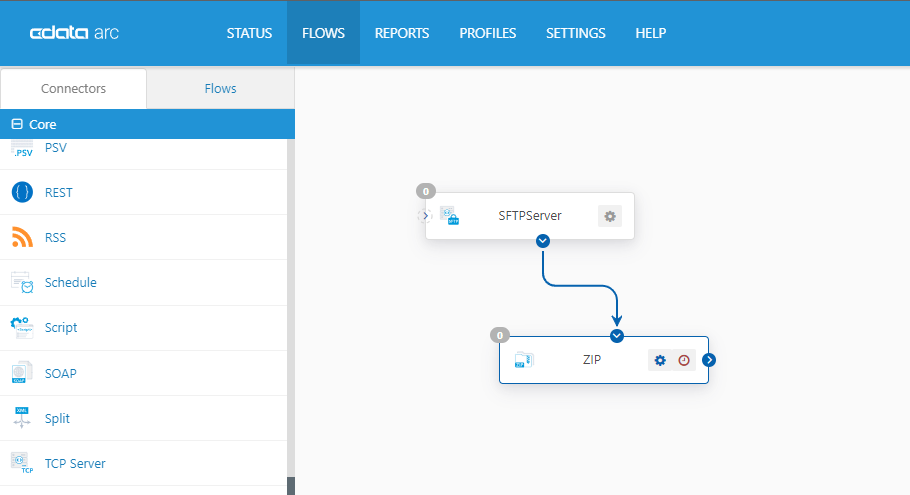
This blue flow arrow means to move files from the Receive folder of the SFTP Server Connector into the input (Send) folder of the ZIP Connector.
Similarly, files that pass through the flow and arrive at an FTP Server or SFTP Server Connector will arrive in the Send folder for that connector.
For example, lets say you want to Encrypt files with PGP before your trading partner downloads them from the server. You can use the Arc OpenPGP Connector to perform this encryption and then use the blue flow arrow to ensure encrypted files are passed along to the Send folder in the SFTP Server Connector:
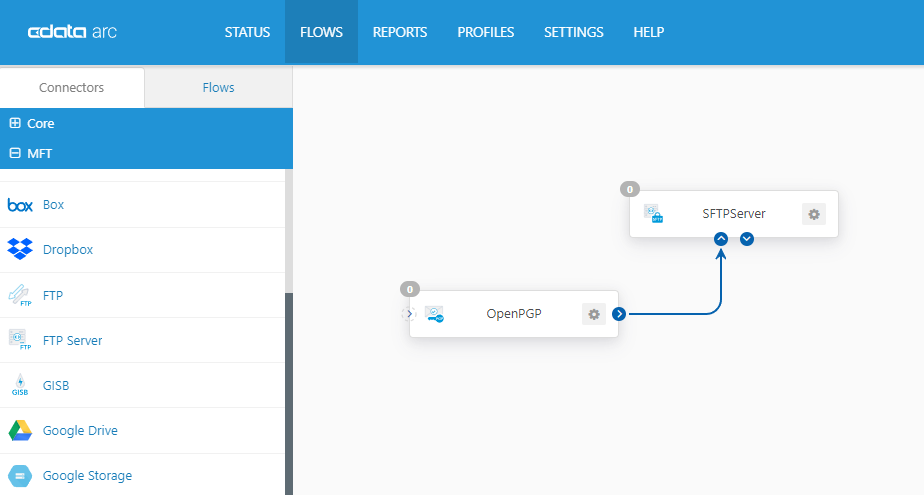
Thus, the remote client would simply need to connect to the Send folder to find files processed using parameters set in the larger Arc workflow.
Using the Connectors as a Standalone Server
The FTP Server and SFTP Server Connectors do not have to be used as part of a larger flow.
If you don't need Arc to process the files transferred to and from the server, just directly access the Send & Receive folders to find uploaded files uploaded or place files that should be downloaded.
For example, you may have an external system that processes files after they are transferred to your server; this external system monitors a specific folder to pick up files for processing. You can simply set the Receive folder in the FTP Server or SFTP Server Connector to the folder where your external system picks up files.
Similarly, if you have an external process that generates files your partners need to download, you can simply set the Send folder in the FTP Server or SFTP Server Connector to the folder where your external system places the files.
Active Directory Integration (Windows Authentication)
Arc's SFTP Server supports using Active Directory (Windows Authentication) to authenticate to the server.
When using this approach, the SFTP Server Connector approach described in previous sections no longer applies. Instead, the Use Windows Authentication checkbox should be checked in the Profile page:
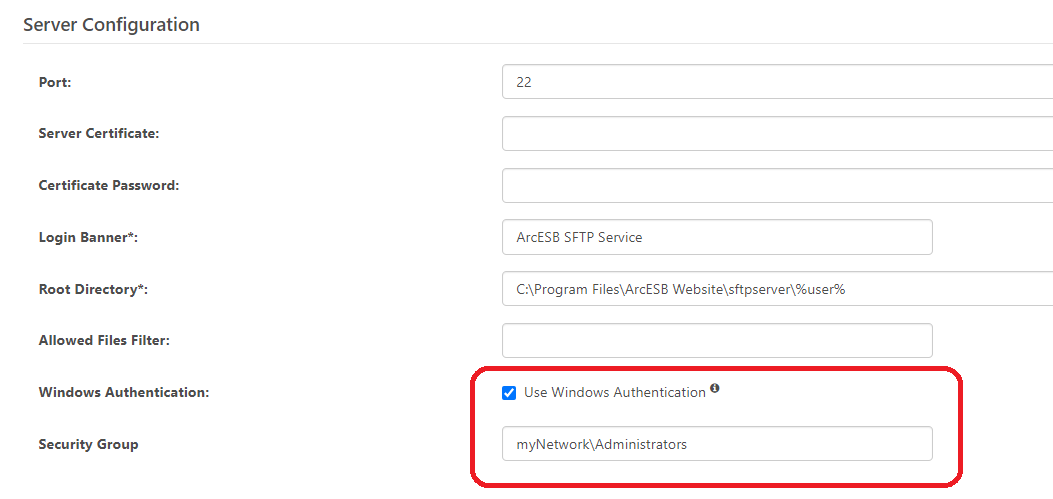
When Windows Authentication is enabled, the Security Group field will appear and should be set to the Windows Group that is permitted access to the server using its regular Windows credentials.
Since this approach does not use SFTP Server Connectors, the 'user' macro is automatically appended to the server's Root Directory to keep the files for different users separate.
Files will not automatically pass through the flow when uploaded to the server using Windows Authentication. In order to bring a file into an Arc flow, add a File Connector to the flow that pulls files from the specific user's upload directory or pushes files to the user's download directory.
Next Steps
If you haven't already, you can get started with Arc for free by downloading the application here. Arc comes with a free, fully-functional 30-day trial license, so you can confirm for yourself that hosting an FTP or SFTP Server is as simple as described in this article.
Here in the knowledge base, you can also find articles on getting Arc up and running, implementing the client-side of FTP and SFTP, and more.
If you need help setting up your Arc workflows, please don't hesitate to reach out to our technical team at [email protected].
Ready to get started?
Use Arc's free 30-day trial to start building your own custom workflows today:
