")
Introduction to the Flows Page
The Flows page in Arc provides a blank canvas for creating business workflows.
This is a beginner's guide to the tools available in the Flows page, including:
Available Tools
The tools in the Flows page constitute the core of Arc's feature set:
Connector
The left side of the Flows page contains a toolbox of Connectors:
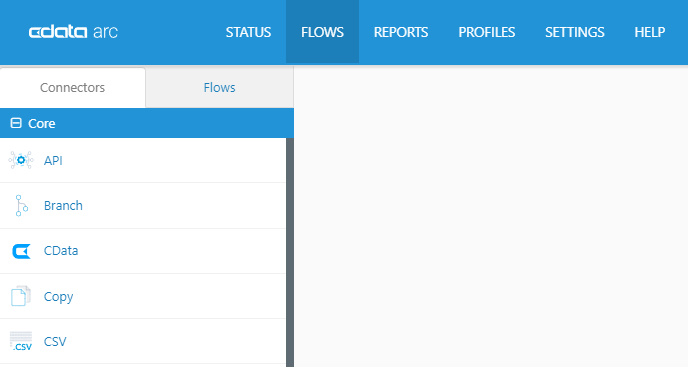
There are several types of connectors, each designed for a different purpose:
- File Transfer Connectors: Implement a file transfer protocol to send & receive files between partners and applications.
- Data Translation Connectors: Translate data and documents from one format to another, e.g. from CSV into XML, or X12 to XML to Excel.
- Logical Connectors: Automate logical functions, such as copying and routing files based on if/then conditions you can easily set.
- Integration Connectors: Connect your file workflows to specific databases and data sources, such as MySQL, SQLite, and NetSuite.
Dragging a connector from the toolbox into the Flows canvas will create an instance of that connector.
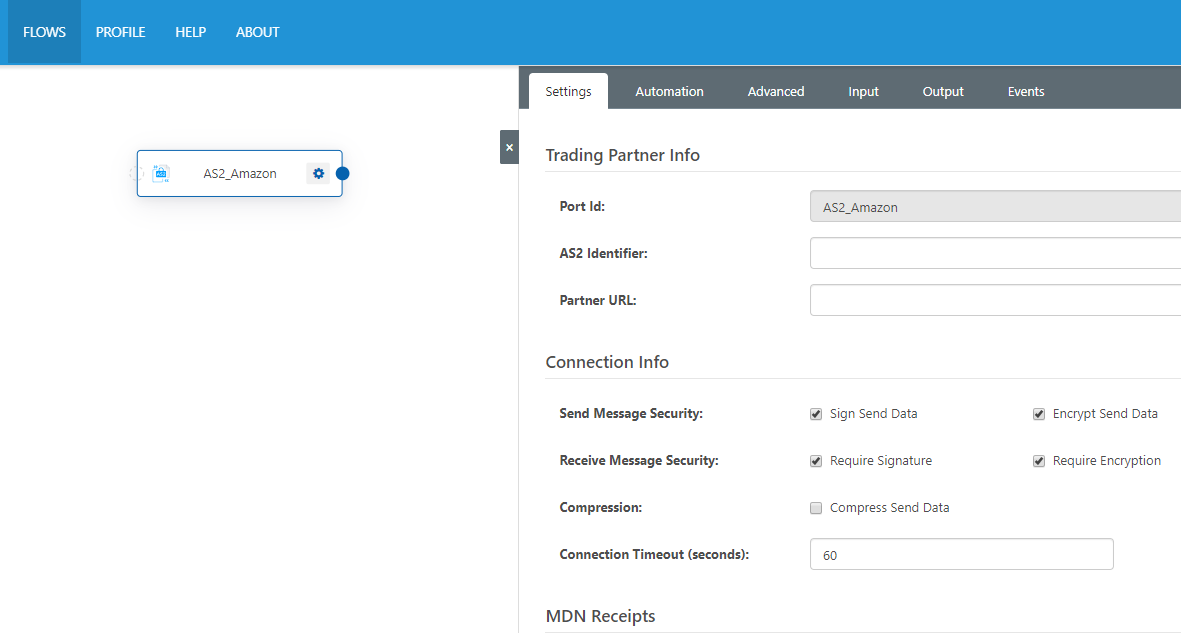
Click on a connector to bring up the configuration panel:
The Flows Canvas
Once connectors are added to the Flows canvas, they can be connected to establish a logical data flow.
Click and hold the blue dot to the right of a connector, drag it to the left edge of another connector, and release the dot to create the connection:
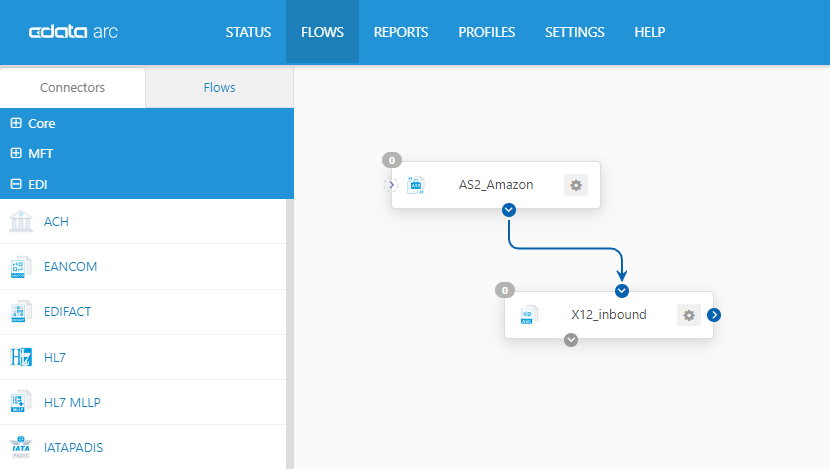
When connectorA is connected to connectorB, files that are processed by connectorA will automatically be passed along to connectorB for further processing.
This functionality is the core of Arc: drag Connectors and Transforms into the Flows canvas, click on the connector instances to configure them, and connect the connectors to establish a data flow.
Views and Connectors
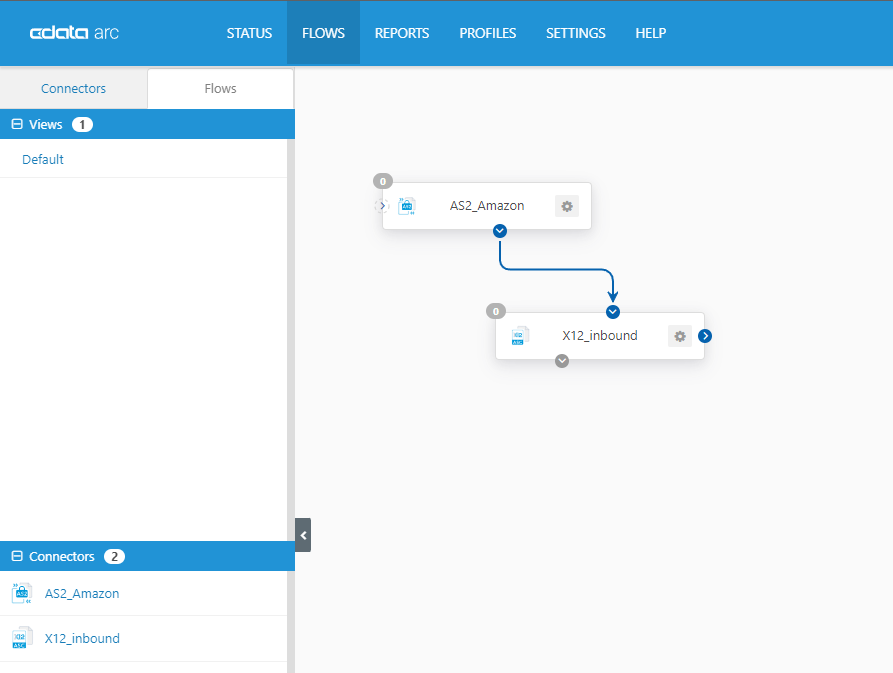
The left side of the Flows page has a third tab: 'Flow'. Click this tab to bring up a list of Views and configured connectors.
Views are saved positions in the Flows canvas. If the Flows canvas is analagous to Google Earth, a View is a set of coordinates that determine which part of Earth you want to see. To save a View, click the eye icon to the right of the page:
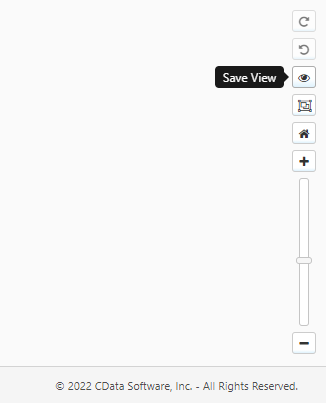
When you save a View, Arc records the canvas position and zoom level. Click on a saved View to return to this exact location and zoom at any time.
Underneath the saved Views is a list of configured Connectors. Click any connector in the list to jump to its position in the canvas and open its configuration settings.
Workspaces
The top right of the Flows page has a Workspaces widget:
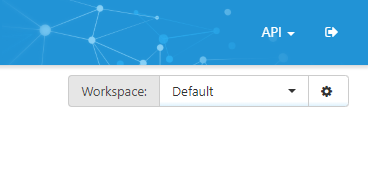
Workspaces are logically separate canvases for building Flows. If the Flows canvas is analagous to Google Earth, then different Workspaces are entirely different planets.
The cogwheel on the right side of the Workspaces widget can be used to Import and Export entire Workspace configurations.
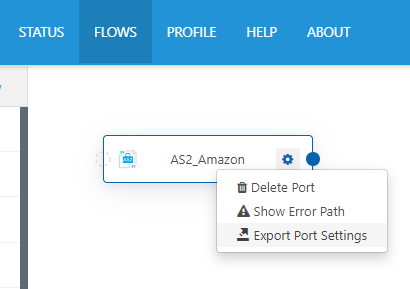
To instead export individual connector settings, right-click the connector in the flow and select 'Exconnector Connector Settings':
Next Steps
Now that you're familiar with the Flows page, it's time to begin creating your first Flow.
You can check out our Creating Your First Flow article for an example of building a Flow from the ground up.
You can also find pre-packaged integration flows available for free download at our website, here.
Ready to get started?
Use Arc's free 30-day trial to start building your own custom workflows today: